|
|
||
|---|---|---|
| kicad | ||
| library@3f3f15e7c3 | ||
| picture | ||
| .gitignore | ||
| .gitmodules | ||
| .qeda.yaml | ||
| CHANGELOG.md | ||
| DEVELOPMENT.md | ||
| KiBOM_CLI.py | ||
| LICENSE.txt | ||
| Makefile | ||
| README.md | ||
| bom.ini | ||
| fp-lib-table | ||
| passkey.kicad_pcb | ||
| passkey.kicad_pro | ||
| passkey.kicad_sch | ||
| sym-lib-table | ||
| version | ||
README.md
passkey types your credentials upon button press.
 .
.

purpose
This USB dongle will help out if you have to enter your credentials frequently. Temporarily store the credential on it, and press a button for passkey to enter it for you.
usage
- passkey will appear as USB serial port and keyboard
- connect to it using a serial terminal (baud rate is not important)
- enter the credentials you often have to input
- press on one button for passkey to input the username and password
- press on the other button for passkey to input password
More details are provided in the firmware.
hardware
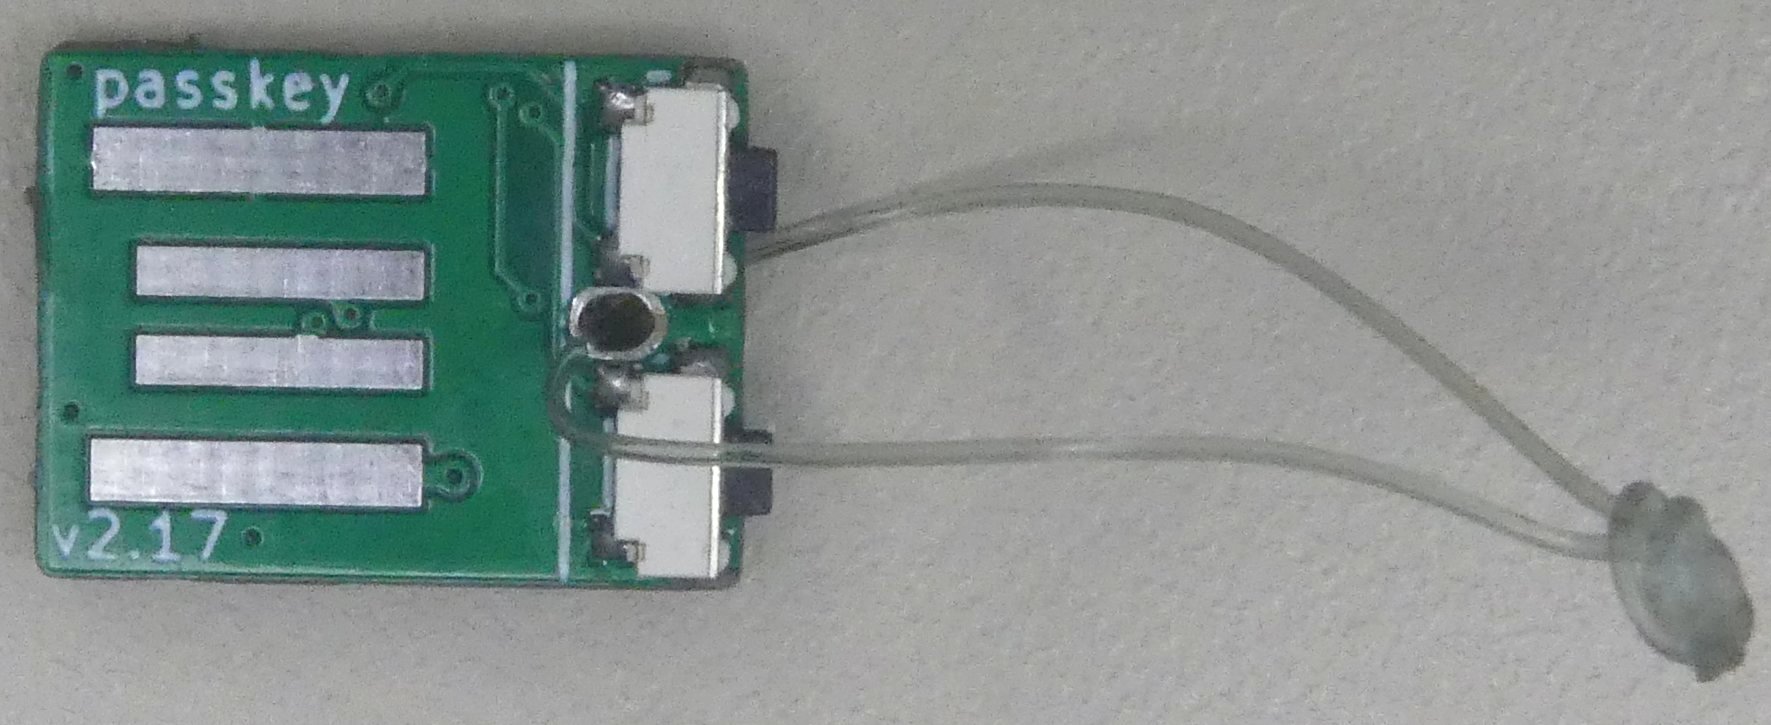
The passkey is a USB dongle that fits within a USB type-A port. Only the two buttons stick out to you can press on them. An LED indicates if credentials are stored in the dongle. Cover the back of the PCB assembly with hot glue so it fits well the USB port and does not create shorts.
mode of operation
The core of the device is a micro-controller that supports native USB. I will act as serial port, to input the credentials, and HID keyboard, to paste back the credentials.
After several trials, I chose the STM32F042F6P for the following reasons:
- small enough to fit in USB port
- TSSOP package easy to hand solder
- does not need an external crystal, as it can recover the 48 MHz clock from the USB communication, saving board space
- has embedded balancing and pull-up USB resistors, saving board space
- is readily available and cheap, hoping the next chip shortage will affect it less
- has little embedded flash (32 kB), but enough to run tinyUSB (not libopencm3 though)
- provides readout protection, to lock the flash and disable the debug interface
- requires little power, to use a small LDO, saving board space
The board has test points on the back for SWD (labeled C for SWCLK and D for SWDIO), and UART debug (labeled G for ground and T for RX).
A fuse is added to the board, just to prevent shorts when the dongle is plugged in but the glue is not applied correctly on the back of the board.
Physical tactile switches are used instead of capacitive touch to avoid accidental credential pasting.
A hole between the two buttons allows to put it on a string. This makes removing the dongle from the port more easy. This way you can also put it on your key-ring, so it is less likely you forget the dongle when leaving the computer unattended.
The MCU and readout protection have no security certification. They could probably by bypassed using fault injection. This could allow an attacker to install malicious firmware, saving the credentials in non-volatile memory for later retrieval. Thus, it you notice any tampering of the device such as different glue pattern, just toss the device away. The under $2 cost for this device makes it not worth the risk. If you don't trust the source where you got the device from, since the hardware and firmware are open-source, just build the device yourself.